
Heh. Japanese stuffs have never failed to be super duper cute! Even though you're in American style, some of the American style clothes can also fit well with the Japanese style accessories.

[Click to enlarge]


As the title says, you need glitter. LOTS of LOTS of cute colors of glitters :D !

I bought these glitters from different stationary stores. Of course, 80% of the stationary stores do sell glitters and most of them are the same colors. Blood red, victory blue, mystery green, mystery purple then very light blue and yellow.
So the materials you need are:
Glitters. You can get them in any stationary shops
(Plaster doll! Yeap, a special design for April edition of CosmoBox. 'Cuz its a special month :) )
(Plaster doll! Yeap, a special design for April edition of CosmoBox. 'Cuz its a special month :) )

Plain transparent glue. Any size will do. I regretted buying this big and it used up only 0.5/10 of the glue :/

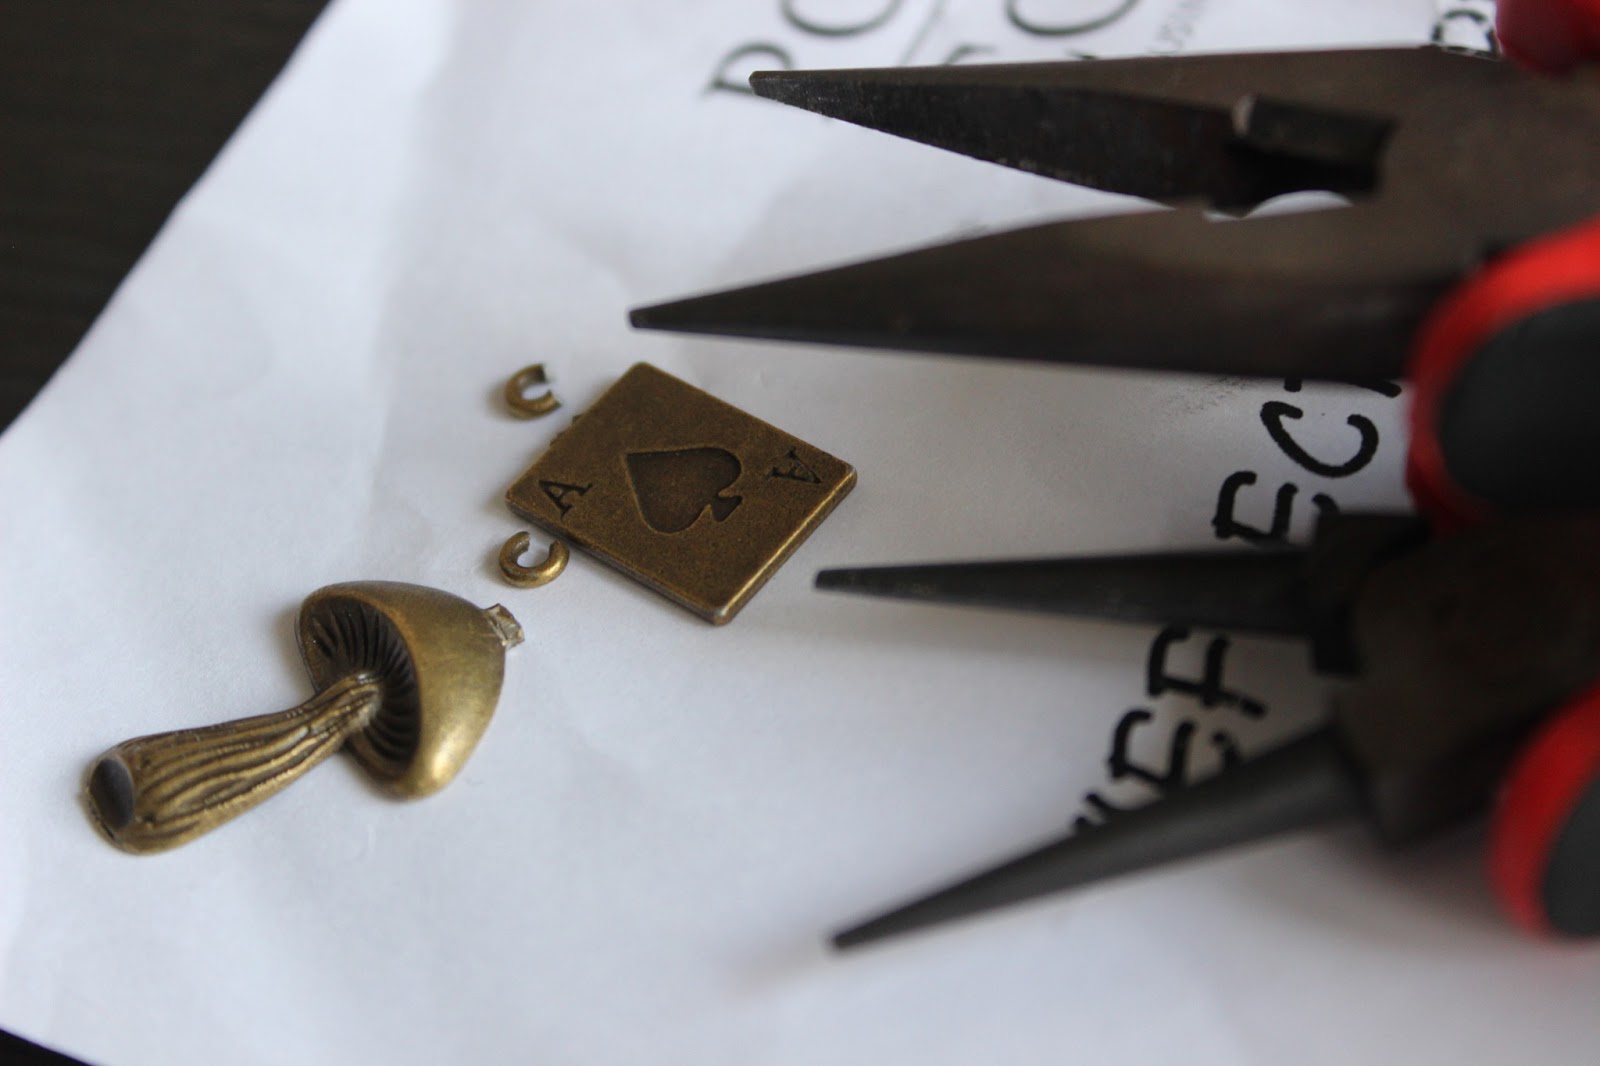
CHARMS! You can't do it without them XD These are what I mentioned on the previous Taobao Haul :)
But you can also get them in any beading store.

Plates :) They are the main thing. They are also called as "Picture Frame" These are what I mentioned on the previous Taobao Haul :)

Acrylic Paint from Daiso. Many like to use white but I find black better.

Most important 'ingredient'- Resin. It's a chemical and it's dangerous for kids, do not inhale it deliberately!
I bought these in Beading.my which they kinda forced me to reach RM30 (delivery fee NOT included) then only they will send out the parcel :(

Plain white folder from Daiso. You can see me testing with colors and black does the job better, for me, at least XD

Findings. This was what I mentioned on the previous Taobao Haul :)

Nail Gems! This was what I mentioned earlier on the previous Taobao Haul :)

Chains :D This was what I mentioned on the previous Taobao Haul :)

These are the bigger Gems. I bought them years ago at Beading.my when they were having sales.

MORE CHARMS! :D these are from Beading.my

Toothpicks. You can choose other tools which you may find them convenient :)

and lastly, PLIERS. They are needed to twist the round hanger thingy off the charms.
How to make it
You can always make them plain but for this post, we're doing it with glitter! :D

Firstly, you design/decorate how you want your charm to be

Then paint all the base of the frames with the Acrylic paint


Then sprinkle the glitter to the readied glue that you squeezed out from the bottle and onto the plain folder.


Wait for the paint on the frames to dry.
Then, with the toothpick, gently 'scoop' the mixture up and 'paint' it to the dried-base frame

Mix the another color of glitter with the glue and 'paint' it on the opposite of the first color of your glitter.
We're going to do the gradient so we'll have to do this :)


With the remaining glitter (or, you can add more), mix them up and place them at the middle section of the frame.


Before the glue dried out, place the charm(s) carefully onto the frame and press it gently.


You can move it a little if the charm is not on your desire spot of the frame.

AAAAAAAAAND, your first piece is done! :D
CONGRATZZ!
You can also do another one if you want to :)


So these are my first batch and they are made with full of love :)
Most of them I gave them out as birthday presents ^^
But these are not done yet >:(

Remember the gems? I added them to make it a different look.
BUT TAKE NOTE THAT: after you applied resin, the 3D-ness of the gem will become FLAT :(

I left the pieces behind the monitor because
I found this post on Facebook saying that the back of the monitor has the most radiation.
And its true XD

Resin time!
(Do not inhale them deliberately. Dangerous!)
And also, remember to wear disposable gloves. Uneasy but handy when you accidentally touched resin.
They are very hard to be washed away :(
Mix A and B with the amount instructed on the instruction.
Mine is A:B , 2.5:1

Then rotate it CLOCKWISE only! to minimize the creation of bubble


If there IS bubble, leave it for 10 minutes for the bubbles to arrive to the surface.
Do that when there's no bubble too, just in case.


After 10 minutes, fill the unfinished charm with the resin CAREFULLY :)

This is important!!
You must not leave the charms under sun or in a place that has room temperature over 30 degree Celsius!
It will cause leaking and it will be a big mess :(
I know, I tried.
Best thing you do is to turn the air-conditioner on and leave these babies under it :)


So here are the finished items! YEEPIE!!


This one 's a 3D :3

How To know if your item is REALLY ready?
There will be no denting after you pressed it hard.


AAAAAAAAAAAND YOU'RE DONE!
You can either Chain them up like these
Or just make them into something else like keychains and hair pins.
You can also buy different metal frames.
There are the combs, bookmarks, hearpins and so on! :D
Here's a brief tutorial for this DIY Project :)
Here's a brief tutorial for this DIY Project :)
Hope you enjoy your DIY session :)
- D-TTO -


How big is the charm base??
ReplyDeleteI would say... about the size of of a Malaysian 50 cent, beer bottle caps or size of a circle with half your thumb and index finger
Delete